 Pin It
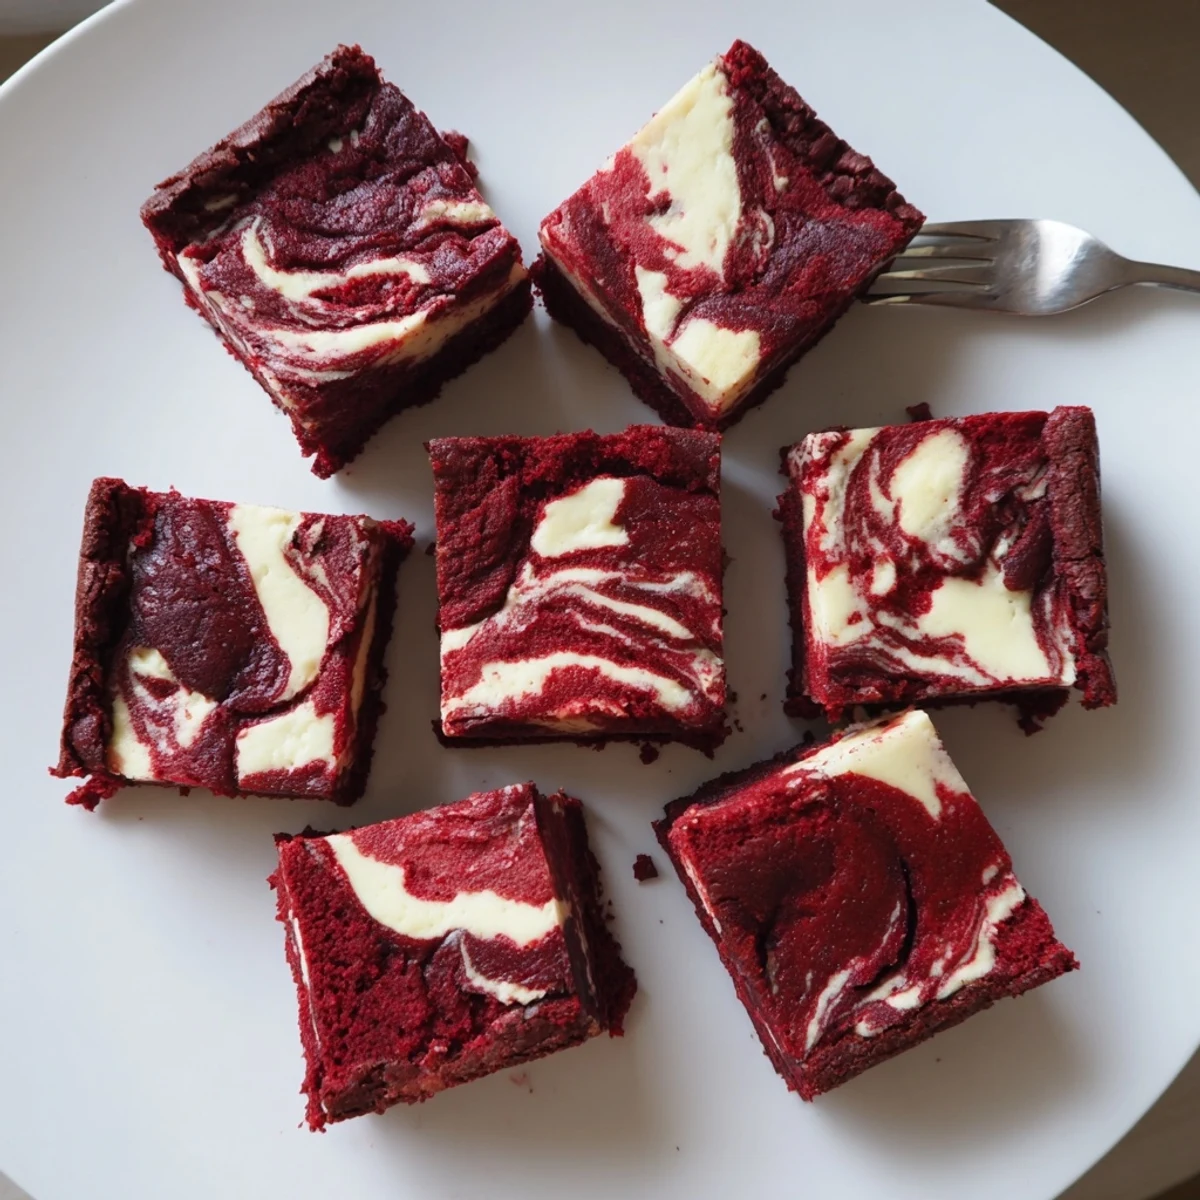
 These indulgent red velvet brownies feature a fudgy chocolate base topped with velvety cheesecake swirls, creating a beautiful marbled pattern. The combination of rich cocoa, subtle vanilla, and tangy cream cheese delivers the perfect balance of flavors and textures.
Each square offers the dense chewiness of traditional brownies complemented by the smooth, creamy contrast of cheesecake. The vibrant red color makes these treats eye-catching for special occasions, dinner parties, or holiday gatherings.
Baking takes just over 30 minutes, and the result is a decadent dessert that serves up to 16 people. Enjoy them chilled for a firmer texture or at room temperature for a softer, fudgier experience.
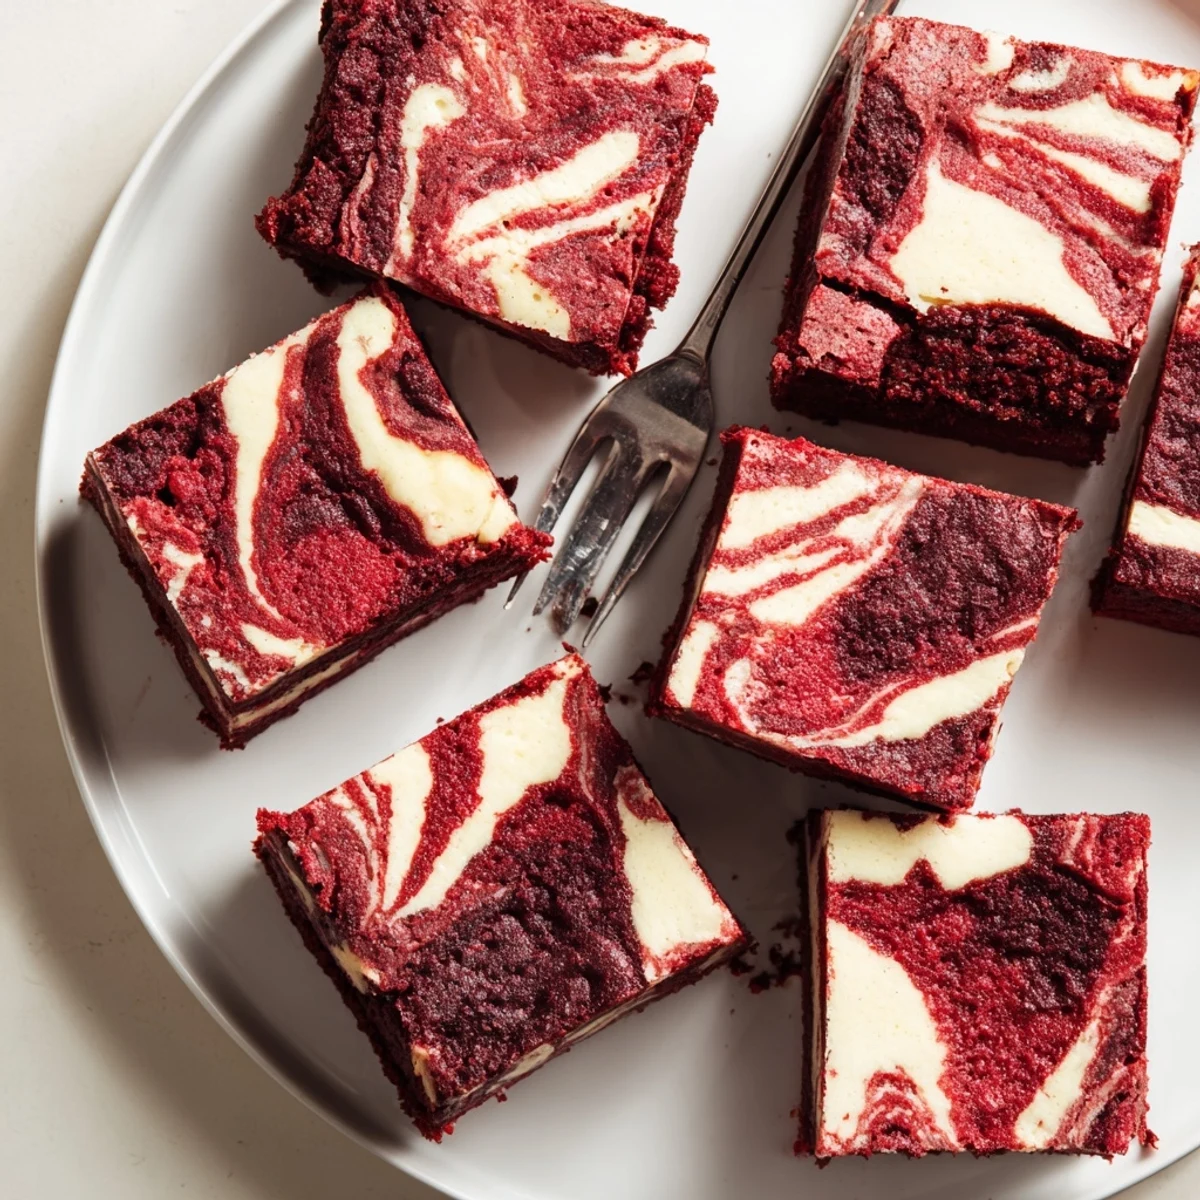
The first time I brought these to a dinner party, my friend Sarah actually gasped when I cut into the pan. That marble pattern with the deep red against cream white looks like something you'd see in a bakery window, but the truth is they're surprisingly straightforward to make. I've since learned that the secret is not going too heavy on the swirling—you want distinct ribbons running through, not a muddy blend.
I made these for Valentine's Day one year when I completely forgot to plan anything special. My husband walked in while I was swirling the batters together and immediately asked what bakery I'd stopped at. That moment when someone thinks you bought something you actually made by hand never gets old.
Ingredients
- Unsalted butter: Melted and slightly cooled, this creates the fudgy foundation that separates brownies from cake
- Granulated sugar: You'll use this in both layers, so measure out both portions before you start mixing
- Large eggs: Room temperature eggs incorporate more smoothly and prevent the cheesecake layer from separating
- Vanilla extract: Pure vanilla makes a noticeable difference here since it's competing with the cocoa
- Red food coloring: Gel coloring gives you that vibrant jewel tone without adding excess liquid
- All purpose flour: Sift it first to avoid any stubborn lumps in your brownie batter
- Unsweetened cocoa powder: Dutch processed cocoa has that deep, almost wine like chocolate flavor that pairs beautifully with the cream cheese
- Salt: Just enough to intensify the chocolate without making these taste savory
- Cream cheese: Full fat and completely softened is non negotiable for that silky swirl layer
Instructions
- Get your oven ready:
- Preheat to 350°F and line your 8x8 pan with parchment, letting the edges hang over like handles.
- Make the red velvet base:
- Whisk melted butter and sugar until smooth, then beat in eggs, vanilla, and food coloring until you've got that shocking red color.
- Add the dry ingredients:
- Sift in flour, cocoa, and salt, then fold gently until just combined—overmixing makes tough brownies.
- Reserve some batter:
- Scoop out about 1/4 cup of the red velvet mixture and set it aside for the top swirl.
- Spread the base:
- Pour the remaining batter into your prepared pan and smooth it into an even layer.
- Make the cheesecake swirl:
- Beat softened cream cheese with sugar until completely smooth, then add egg and vanilla.
- Layer it up:
- Pour the cheesecake mixture over the brownie base and spread gently.
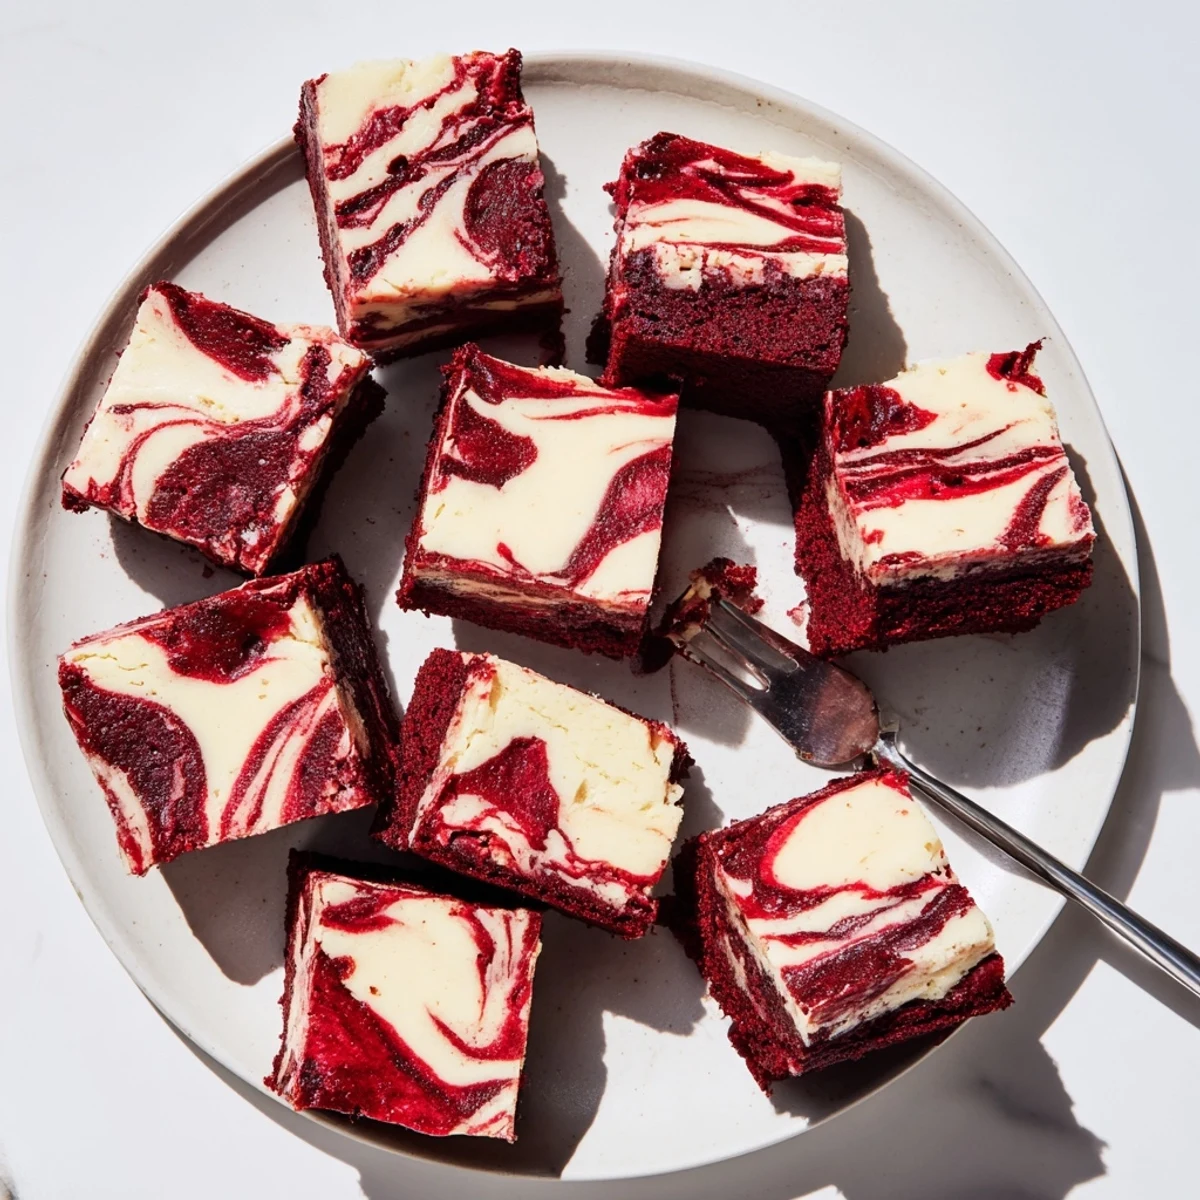
- Create the marble:
- Drop spoonfuls of your reserved red velvet batter onto the cheesecake layer and drag a knife through in long, continuous strokes.
- Bake until just set:
- Bake for 33 to 36 minutes until the center has a slight wobble like gelatin and a toothpick comes out with moist crumbs.
- Patience pays off:
- Let these cool completely in the pan before cutting—warm brownies will crumble and lose those clean swirls.
 Pin It
 My mom kept asking me for the recipe after trying these, but she couldn't believe it was just brownie batter and cheesecake mixture swirled together. Sometimes the most impressive desserts are just simple components done thoughtfully.
Getting the Perfect Swirl
The technique that transformed my swirls from messy to marble was switching from swirling in circles to running my knife through the batter in one continuous S pattern. Circle swirling blends everything too much, but long, gentle strokes keep each layer distinct while still creating that beautiful interplay between red and white.
Temperature Matters
I've learned that all your ingredients should be at roughly the same temperature—room temperature eggs and cream cheese, butter melted but not hot. When ingredients are too cold or too hot, they don't emulsify properly, and you end up with streaks or pockets in your finished brownies.
Serving and Storage Secrets
These are actually at their best after a night in the refrigerator. The cheesecake layer firms up beautifully and the flavors have time to meld together into something more complex than the sum of its parts. I always make them a day ahead when I'm taking them somewhere.
- Use a hot knife for clean cuts—run it under hot water and wipe dry between each slice
- Let chilled brownies sit at room temperature for 15 minutes before serving so the fudgy texture comes through
- Store with parchment paper between layers if you're stacking them in a container
 Pin It
 Every time I make these, I'm reminded that some of the best desserts come from combining two things we already love. Red velvet and cheesecake were both classics on their own—together, they're something magic.
Recipe Questions & Answers
- → How do I know when the brownies are done baking?
-
Insert a toothpick into the center of the pan. It should come out with a few moist crumbs but not wet batter. The edges should be slightly set while the center still has a slight jiggle.
- → Can I make these ahead of time?
-
Yes, these actually taste better after chilling in the refrigerator for several hours or overnight. The flavors meld together and the texture becomes firmer, making them easier to cut cleanly.
- → What's the best way to achieve the marbled swirl effect?
-
Drop spoonfuls of the reserved red velvet batter randomly over the cheesecake layer. Use a knife or skewer to gently drag through both layers in a circular or S-shaped motion, being careful not to overmix.
- → Can I use liquid food coloring instead of gel?
-
Liquid food coloring works, though you may need slightly more to achieve the vibrant red hue. Gel coloring tends to provide more intense color without adding extra liquid to the batter.
- → How should I store these brownies?
-
Keep them in an airtight container in the refrigerator for up to 5 days. The cheesecake layer requires refrigeration for food safety. Let them sit at room temperature for 15 minutes before serving if you prefer a softer texture.
- → Can I freeze these brownies?
-
Yes, wrap individual squares tightly in plastic wrap and place in a freezer-safe container. They'll keep for up to 3 months. Thaw overnight in the refrigerator before serving.