 Pin It
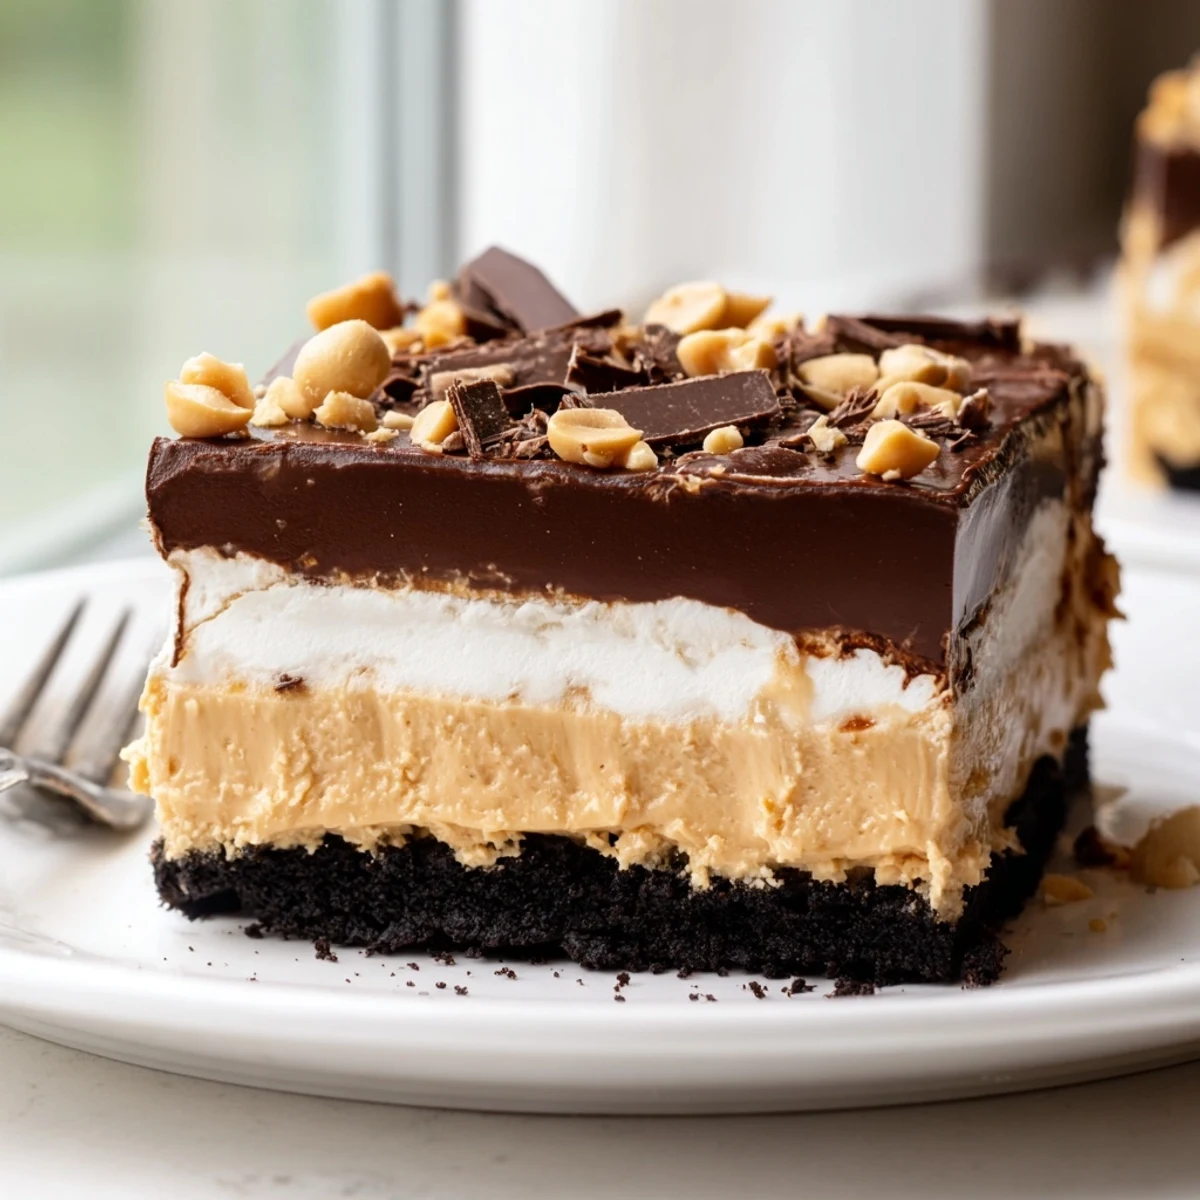
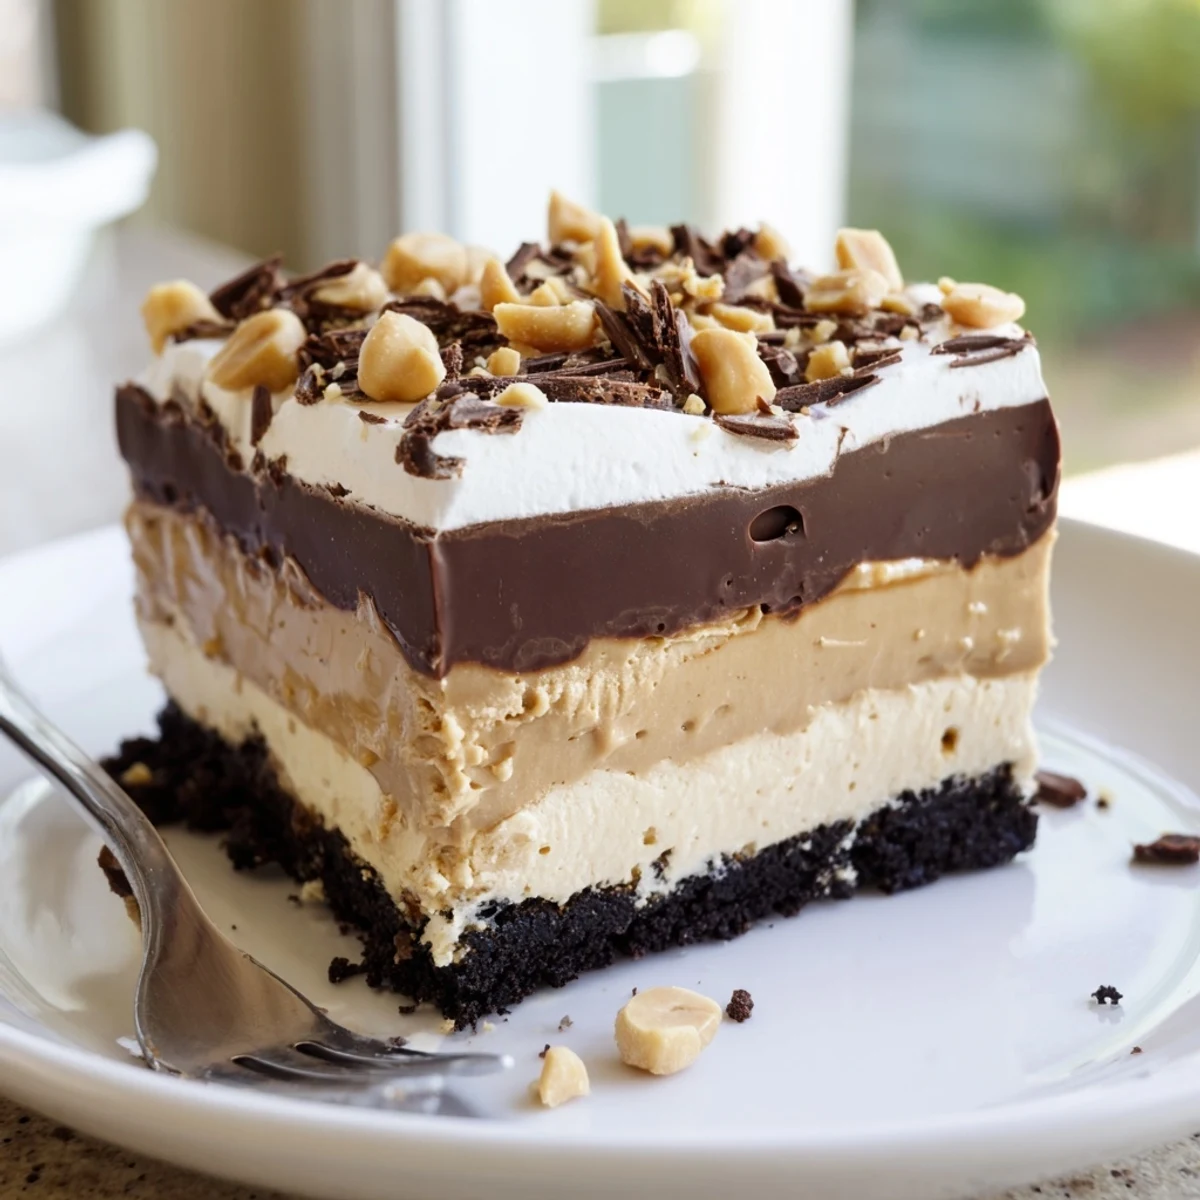
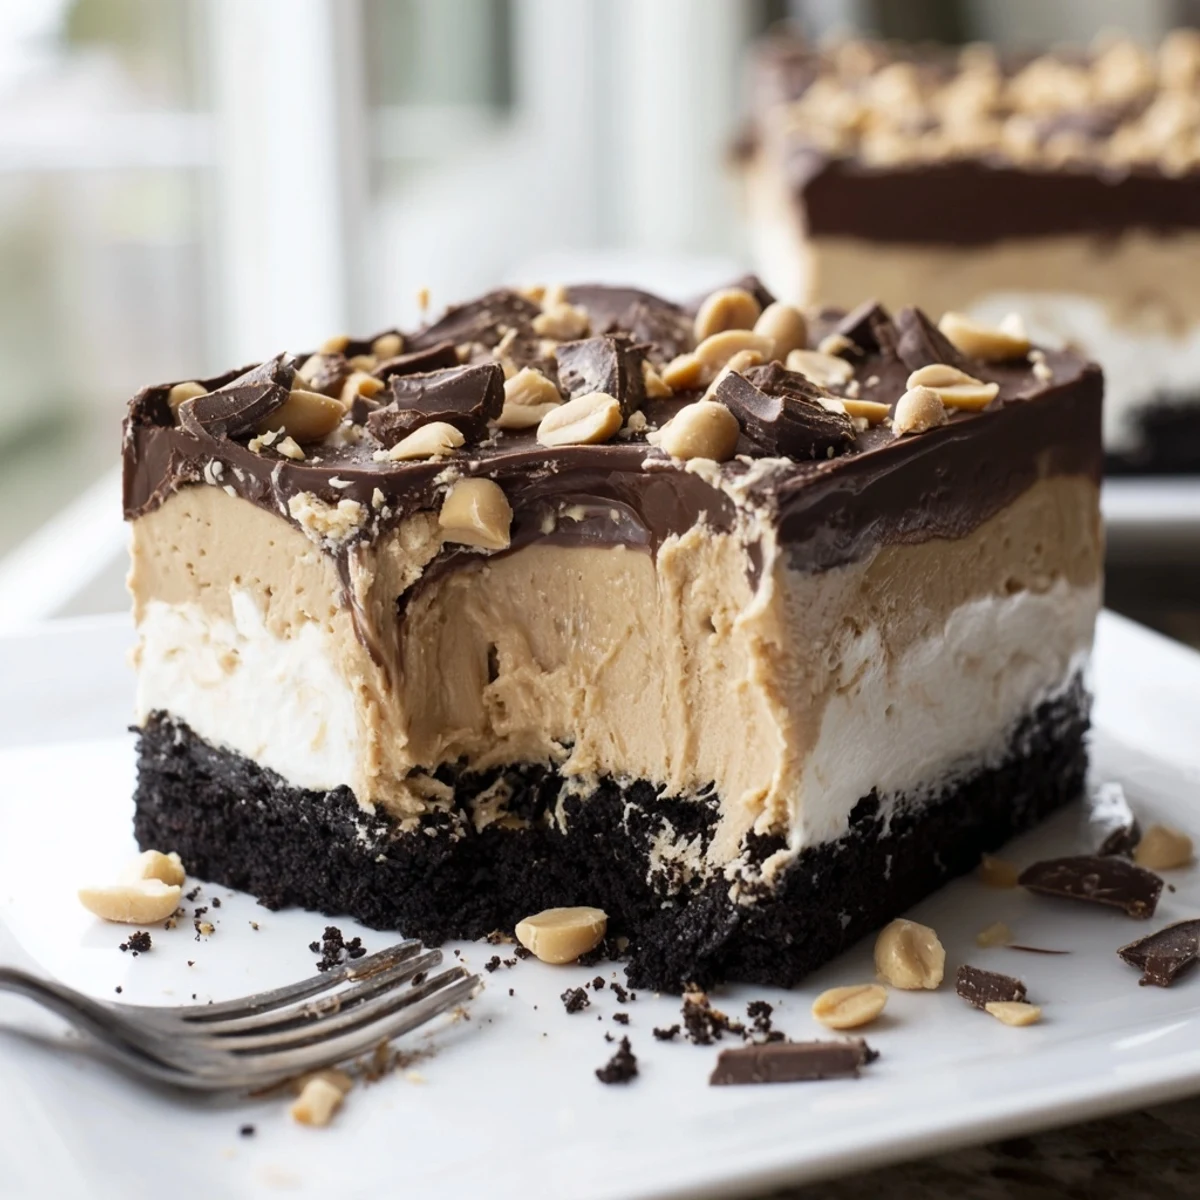
 This no-bake peanut butter layered delight is the ultimate indulgence for peanut butter fans. It starts with a crunchy chocolate cookie crust, followed by a rich and creamy peanut butter filling made with cream cheese and whipped topping.
A glossy chocolate ganache layer adds decadence, and the whole thing is finished with fluffy whipped topping, chopped peanuts, and chocolate shavings. With just 25 minutes of prep and some chill time in the fridge, you'll have a stunning dessert that looks impressive but requires zero baking.
My sister called at 10 pm on a Tuesday demanding something chocolate and peanut butter for her office potluck the next morning, and this layered delight was born out of pure pantry desperation.
I brought this to a neighborhood block party last summer and watched three adults hover over the pan with forks, abandoning all pretense of dignity.
Ingredients
- Chocolate sandwich cookies (200 g): Crush them finely because large chunks make slicing messy and the base crumbles apart when serving.
- Unsalted butter (60 g), melted: Acts as the glue holding your crust together, so do not skimp on this amount.
- Cream cheese (250 g), softened: Pull it from the fridge an hour ahead because cold cream cheese leaves lumps no amount of beating can fix.
- Creamy peanut butter (180 g): Stick with a standard commercial brand here since natural varieties separate and make the layer greasy.
- Powdered sugar (100 g): Dissolves seamlessly into the filling without any grainy texture.
- Whipped topping (150 ml for filling, 200 ml for topping): Thaw it in the fridge overnight so it folds in smoothly without deflating.
- Semisweet chocolate chips (120 g): The ganache depends on decent chocolate, so spring for something you would eat plain.
- Heavy cream (80 ml): This is what transforms chocolate chips into a velvety pourable ganache.
- Chopped roasted peanuts (30 g) and chocolate shavings: Optional but they add a finishing touch that makes the whole dessert look intentional rather than rushed.
Instructions
- Build the cookie base:
- Smash those cookies into fine crumbs and mix with melted butter until everything feels like damp sand, then press firmly into your pan and freeze for 15 minutes while you work on the filling.
- Whip up the peanut butter layer:
- Beat cream cheese, peanut butter, and powdered sugar until completely smooth with no streaks, then gently fold in the whipped topping and spread it over your chilled crust with a spatula dipped in warm water for a perfectly even surface.
- Make the chocolate ganache:
- Microwave chocolate chips and cream in short 20 second bursts, stirring between each one until you get a silky, glossy mixture, then let it cool for a few minutes before pouring so it does not melt the peanut butter layer beneath.
- Chill everything thoroughly:
- Cover the pan and refrigerate for at least 4 hours, though overnight is even better because the layers meld together into something far greater than their individual parts.
- Finish and serve:
- Spread the remaining whipped topping over the set chocolate, scatter peanuts and chocolate shavings across the top, then slice with a hot knife for clean, bakery worthy portions.
 Pin It
 The moment my neighbor asked for the recipe with genuine awe in her voice, I realized this simple layered dessert had earned a permanent spot in my rotation.
Swaps That Actually Work
Try crushed pretzels instead of cookies in the base for a salty crunch that plays beautifully against the sweet layers above, or swap in almond butter if someone at your table has a peanut allergy.
Gluten Free Friendly Adjustments
Gluten free chocolate sandwich cookies work perfectly here, and nobody will notice the difference since the crust gets buried under three other layers of indulgence.
Serving and Storage Smarts
This dessert tastes best on day two when the flavors have fully settled, and it holds well in the freezer for up to a month if you need to plan ahead.
- Wrap individual slices in plastic wrap for easy grab and go portions.
- Let frozen slices thaw in the fridge for about two hours before serving.
- Keep the dessert chilled until the very moment you serve it for the best texture.
 Pin It
 Some desserts demand skill and precision, but this one mostly asks for a freezer and a little patience, and it rewards both generously.
Recipe Questions & Answers
- → Can I make this dessert ahead of time?
-
Absolutely! In fact, it tastes even better when made the night before. The layers have more time to set and the flavors meld together beautifully. Just keep it covered in the fridge until ready to serve.
- → What can I substitute for whipped topping?
-
You can use an equal amount of freshly whipped heavy cream sweetened with a bit of powdered sugar and vanilla extract. Stabilized whipped cream works best to maintain structure over time.
- → How should I store leftovers?
-
Store any leftovers covered in the refrigerator for up to 4 days. The cookie base may soften slightly over time but the dessert will remain delicious. Avoid freezing as the whipped topping layer may separate.
- → Can I use natural peanut butter instead of creamy?
-
Standard creamy peanut butter works best for a smooth, stable layer. Natural peanut butter tends to separate and can make the filling oily. If using natural, make sure to stir it very well and consider adding a bit more powdered sugar to help bind it.
- → What size pan should I use?
-
A 23 cm (9-inch) square or round springform pan is ideal. A springform pan makes it easy to remove the dessert for clean slicing. If using a regular baking dish, you can serve it directly from the dish or line it with parchment paper for easier removal.
- → How do I get clean slices when serving?
-
Use a sharp knife dipped in hot water and wiped dry between each cut. This helps the knife glide through the layers cleanly. Always serve well chilled for the neatest presentation.