 Pin It
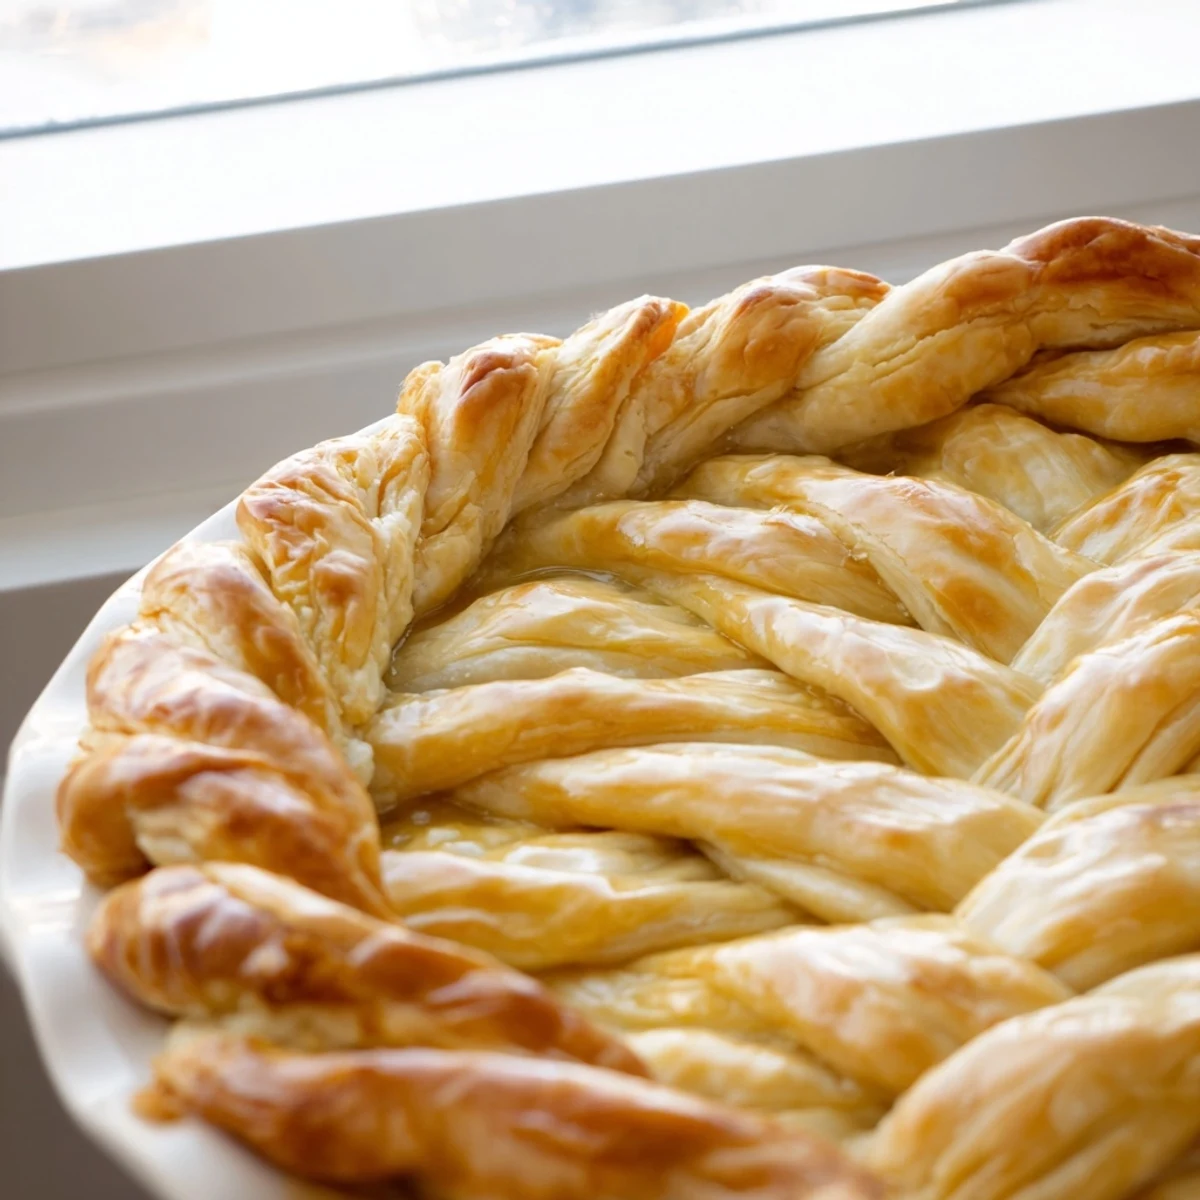
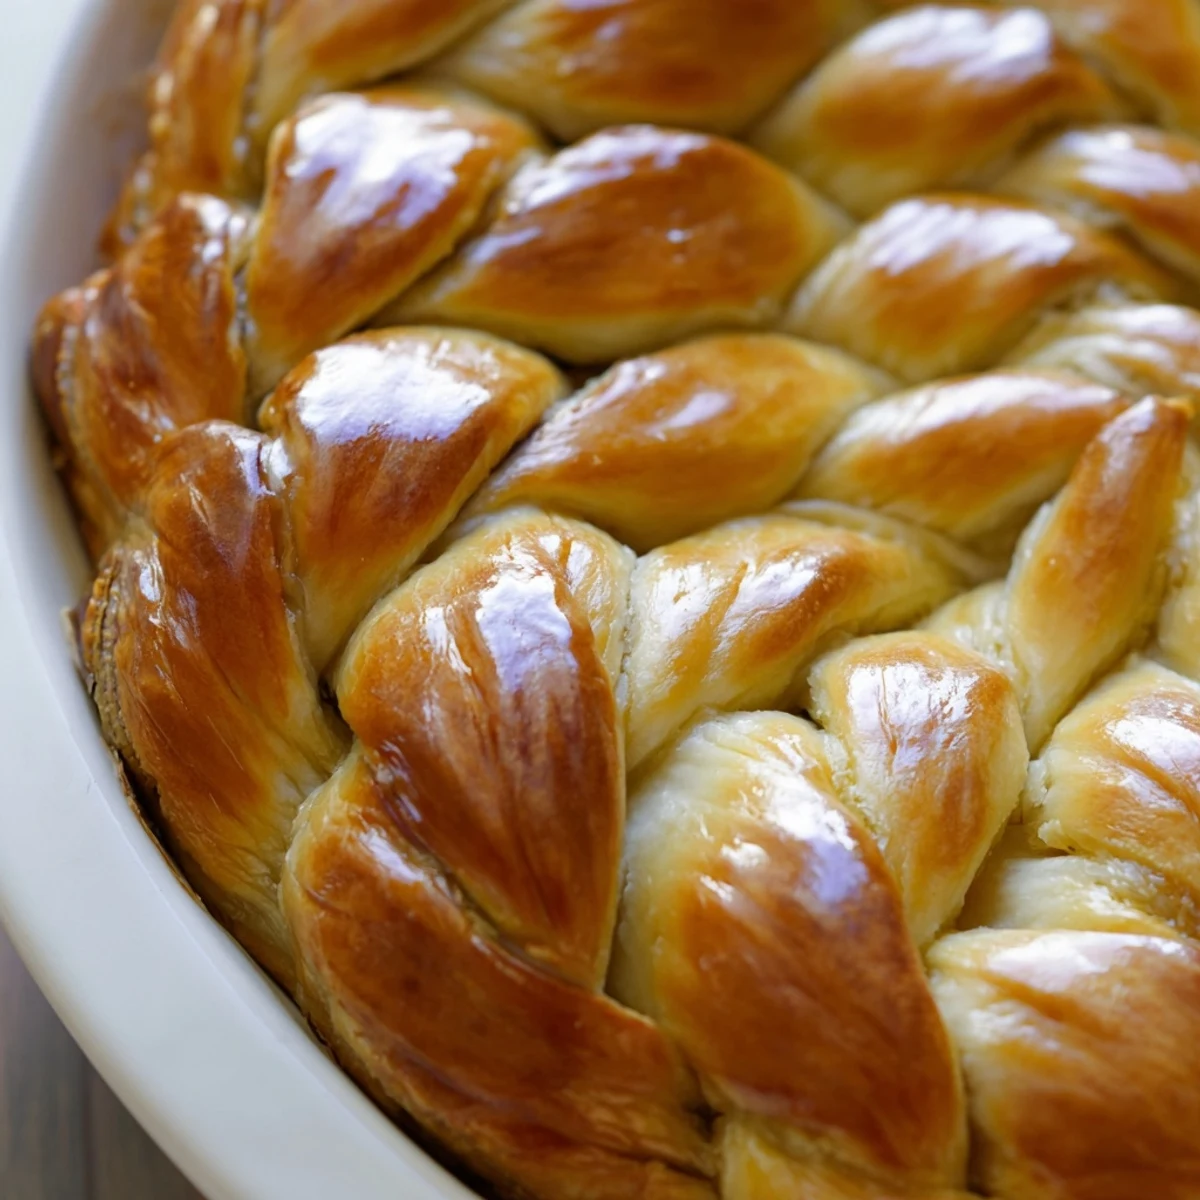
 Elevate your homemade pies with a professional fishtail braid crust that rivals bakery-quality presentation. This intermediate-level technique transforms ordinary pastry into an edible work of art, requiring just basic pie dough, patience, and a simple weaving method.
The process involves creating twelve even dough strips, grouping them into sets of four, and following an over-under weaving pattern to form intricate braided borders. After chilling to firm the dough, brush with egg wash for golden perfection and blind bake until beautifully crisp.
This versatile decoration works beautifully with fruit fillings, custards, or savory pot pies, impressing guests while delivering flaky, buttery pastry in every bite.
The first time I attempted a braided pie crust, my kitchen looked like a flour bomb had gone off. I was trying to impress some dinner guests with what I thought would be a simple decorative touch, but I spent forty minutes just figuring out the pattern. When that pie finally came out of the oven with its golden woven edge, something magical happened. Everyone immediately assumed I had some secret pastry training, and I just smiled and served the slices.
My sister-in-law asked for the recipe after Thanksgiving dinner, and I had to confess that the only special ingredient was patience and a good YouTube tutorial paused on my phone. We spent the next Sunday afternoon making braids together with our kids, flour everywhere and laughter filling the kitchen. Now whenever I make this crust, I think about how something so simple can create such lasting memories around the table.
Ingredients
- 2 1/2 cups all-purpose flour: The foundation of your crust, bread flour creates too much chewiness so stick with standard all-purpose
- 1 cup cold unsalted butter: Cold butter creates those flaky pockets we all love, so keep those cubes ice-cold until the moment they hit the flour
- 1 tsp salt: This enhances all the flavors in your filling, not just the crust itself
- 1 tbsp sugar: Just enough to help the crust brown beautifully without making it sweet
- 6-8 tbsp ice water: The amount varies depending on humidity, so add it gradually and trust your fingers to tell you when the dough is ready
- 1 egg beaten with 1 tbsp milk: This creates that gorgeous golden sheen that makes your pie look professional
Instructions
- Mix your dry foundation:
- Whisk the flour, salt, and sugar in a large bowl until everything is evenly distributed
- Cut in the cold butter:
- Work those cold butter cubes into the flour with your pastry cutter or fingertips until the mixture looks like coarse crumbs with some pea-sized pieces remaining
- Bring the dough together:
- Add ice water one tablespoon at a time, mixing gently with your hands just until the dough holds together when squeezed
- Rest and chill:
- Divide the dough in half, form into discs, wrap tightly, and refrigerate for at least one hour to let the gluten relax
- Prepare your base:
- Roll out one disc on a lightly floured surface and carefully press it into your pie plate, then trim the edges and return to the fridge
- Create your braiding strips:
- Roll the second disc to about 1/4 inch thickness and cut twelve even strips, each about 1/2 inch wide and as long as possible
- Master the fishtail weave:
- Group strips into sets of four, pinch the tops together, then cross the leftmost strip over the next, under the following strip, and over the last one, repeating until fully braided
- Attach the braids:
- Carefully transfer each braid to the edge of your chilled pie crust, pressing gently to seal and trimming any excess with a sharp knife
- Chill again before baking:
- Refrigerate the assembled pie for 15 minutes to firm up the butter while you preheat your oven to 400°F
- Apply the golden finish:
- Brush the braids generously with your egg wash mixture, taking care not to let it pool in the woven sections
- Bake to perfection:
- Bake for 12-15 minutes until deeply golden, adding pie weights and parchment if blind baking, then fill and finish baking according to your chosen recipe
 Pin It
 Last summer I made this crust for a sour cherry pie using fruit we picked ourselves at a local orchard. My daughter sat at the counter watching me braid, mesmerized by the weaving pattern, and now she asks to help every time. Those moments of passing down kitchen traditions feel even more special when the food looks as beautiful as it tastes.
Making The Dough Work For You
The temperature of your kitchen affects everything about pastry dough. On hot days I will even chill my flour and mixing bowl before starting. If the dough starts feeling sticky or uncooperative, stop and refrigerate it for twenty minutes. Working with relaxed, cold dough makes such a difference in the final texture of those delicate braided edges.
Getting The Braid Just Right
The strips need to be evenly thick or they will bake at different speeds, leaving you with some burnt sections and some undercooked spots. A pizza cutter or pastry wheel gives cleaner edges than a knife. If a strip tears while you are weaving, gently pinch it back together. The egg wash will hide most small imperfections anyway.
Timing Your Assembly
You can make the braids a day ahead and store them between layers of parchment paper in the refrigerator. This actually helps them hold their shape better during baking. Just bring them to room temperature for about five minutes before attaching them to your pie crust so they become pliable enough to curve along the edge.
- Brush the very bottom of your braid with water before pressing onto the crust edge for a better seal
- If the braid starts to brown too quickly, tent the edges with foil for the last few minutes of baking
- Leftover braids can be baked on their own sprinkled with cinnamon sugar for a quick treat
 Pin It
 This crust has become my go-to for holidays and special occasions, though honestly the real joy is in the making. There is something almost meditative about the rhythm of the weaving, and the compliments from guests do not hurt either.
Recipe Questions & Answers
- → What makes fishtail braiding different from regular braiding?
-
Fishtail braiding uses four strips instead of three, creating a flatter, wider woven pattern that resembles a fish's tail. The technique involves crossing the outermost strip over and under alternating strands, producing a distinctive herringbone-style design that's perfect for pastry edges.
- → Can I make the braids ahead of time?
-
Absolutely. You can prepare the braided strips up to 24 hours in advance. Wrap them tightly in plastic and refrigerate. When ready to use, let them soften slightly at room temperature for 5-10 minutes before transferring to your pie crust edge.
- → Why is my dough falling apart while braiding?
-
Your dough may be too warm. Keep everything chilled throughout the process. If strips become soft or sticky, pop them in the refrigerator for 10-15 minutes. Working quickly and using minimal flour helps maintain dough integrity while preventing toughness.
- → Do I need special tools for this technique?
-
No specialized equipment required. A sharp knife or pastry wheel for cutting strips, a rolling pin, and your fingers are sufficient. A ruler helps ensure uniform strip width, which creates more consistent-looking braids.
- → Can I use store-bought pie dough?
-
Yes, refrigerated pie dough works well for this technique. Let it thaw according to package directions, but keep it chilled during handling. Homemade dough typically offers better flavor and workability, but store-bought versions produce lovely results too.
- → How do I prevent burning during baking?
-
Monitor closely after 12 minutes since the braided edges can brown faster than the crust bottom. If darkening too quickly, tent with foil. The egg wash promotes even golden color, so avoid over-baking. Lowering the temperature by 25°F helps with delicate decorative edges.