 Pin It
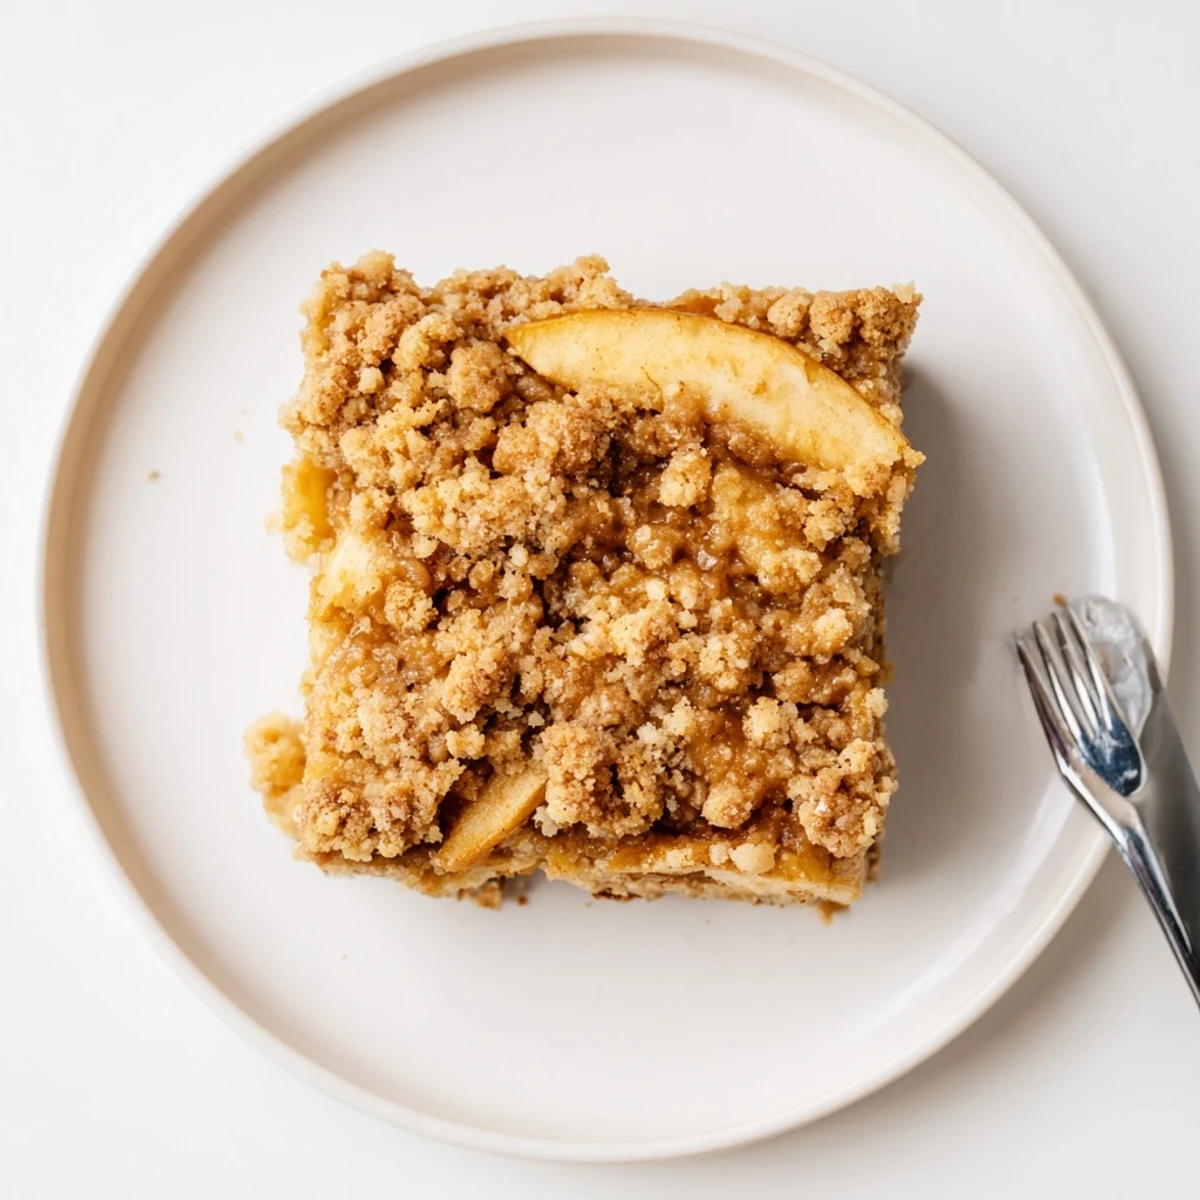
 These caramel apple crumb bars feature three delicious layers that come together beautifully. A tender, buttery shortbread crust forms the base, topped with thinly sliced apples tossed in cinnamon and sugar, then drizzled with rich caramel sauce. The finishing touch is a generous layer of buttery crumb topping that bakes to golden perfection. Each bar delivers the perfect balance of sweet and tart flavors with contrasting textures—soft fruit, gooey caramel, and crisp crumbs. These bars are ideal for autumn gatherings, Thanksgiving dessert tables, or whenever you're craving cozy baked goods.
There is something magical about the smell of cinnamon and apples baking together that instantly makes a gray November day feel cozy. I stumbled onto this recipe when I had a sudden craving for apple pie but zero patience for dealing with pie crust. These bars became my go-to instead, and the way the caramel seeps into the tender apples while everything bubbles away in the oven is absolutely intoxicating.
Last autumn I brought a batch of these to a potluck and watched them vanish in record time. My friend Sarah, who insists she does not like fruit desserts, went back for thirds and finally demanded the recipe. There is something about the combination of tangy apples, rich caramel, and that buttery crumble that makes people absolutely helpless around them.
Ingredients
- 2 1/2 cups all-purpose flour: This forms the backbone of both the crust and crumb topping, giving structure to the tender shortbread
- 1 cup unsalted butter, cold and cubed: Cold butter is non-negotiable here, it creates those flaky, tender layers in the crust that make these bars so special
- 3/4 cup granulated sugar: Just enough sweetness to balance the tart apples without overwhelming the other flavors
- 1/2 teaspoon salt: A pinch of salt makes all the difference in bringing out the buttery notes of the shortbread
- 1 teaspoon vanilla extract: Pure vanilla adds a warm, comforting aroma that pairs beautifully with fall spices
- 3 medium apples: I like using a mix of Granny Smith and Honeycrisp for that perfect sweet-tart balance
- 2 tablespoons lemon juice: This prevents the apples from turning brown and adds a bright note that cuts through all the richness
- 1/3 cup granulated sugar: Coating the apples in sugar helps them release their juices and creates a syrupy filling
- 1 tablespoon all-purpose flour: Just enough to thicken the apple juices so you do not end up with a soggy bottom
- 1 teaspoon ground cinnamon: Cinnamon and apples are basically best friends, do not skip this
- 1/2 cup caramel sauce: Store-bought works perfectly fine, but homemade caramel takes these bars to another level entirely
Instructions
- Get your oven ready:
- Preheat to 350°F and line a 9x9 pan with parchment, letting the edges hang over like little handles that will save your life later
- Make the crumb mixture:
- Whisk flour, sugar, and salt in a large bowl, then work in the cold butter with your fingers until you have uneven crumbs the size of peas
- Stir in the vanilla:
- Drizzle it over the crumb mixture and gently toss to combine, being careful not to overwork the dough
- Reserve some for topping:
- Measure out about 1 1/2 cups of the mixture and set it aside for that glorious crumb topping later
- Press in the crust:
- Firmly press the remaining dough into the bottom of your pan, using the flat bottom of a measuring cup to get it perfectly even
- Par-bake the crust:
- Bake for 12 minutes until just set, which prevents that dreaded soggy bottom situation
- Prep the apples:
- Toss your sliced apples with lemon juice, sugar, flour, and cinnamon until every piece is coated and smelling like fall in a bowl
- Layer it all up:
- Spread those cinnamon apples over the hot crust, drizzle with caramel like you are Jackson Pollock, then scatter the reserved crumbs everywhere
- Bake until golden:
- Return to the oven for 28 to 32 minutes until the top is golden brown and you can see the apples bubbling up through the crumbs
- The hardest part:
- Let these cool completely in the pan, or they will fall apart when you try to cut them, though eating warm crumbs with a spoon is also totally valid
 Pin It
 My mom started requesting these instead of her famous apple pie for holiday gatherings, which is saying something. There is something about cutting them into neat little bars that makes them feel more special and shareable than slices of pie. Plus, the ratio of crust to fruit is absolutely perfect in my opinion.
Making These Ahead
I have learned through trial and error that these bars actually improve after sitting overnight. The flavors have time to mingle and the crumb topping stays perfectly crisp if stored in an airtight container. They are the ultimate make-ahead dessert for busy weeknights or weekend gatherings.
Serving Suggestions
While these are completely perfect on their own, I love serving them slightly warmed with a scoop of vanilla ice cream. The way the cold cream melts into the warm caramel and apples is absolute perfection. A drizzle of extra caramel sauce on top never hurt anyone either.
Storage and Freezing
These bars keep beautifully at room temperature for up to three days, though they rarely last that long in my house. You can also freeze them individually wrapped for those moments when you need a sweet emergency.
- Layer bars between parchment paper when freezing to prevent sticking
- Thaw frozen bars at room temperature for about an hour
- A quick 10 second zap in the microwave brings back that fresh-baked texture
 Pin It
 I hope these bars become as much of a staple in your fall baking routine as they have in mine. There is something so comforting about having a batch tucked away in the kitchen, ready to make any day feel a little more special.
Recipe Questions & Answers
- → What type of apples work best for these bars?
-
A mix of tart and sweet apples like Granny Smith, Honeycrisp, or Braeburn provides the best flavor balance. The tartness cuts through the sweet caramel and buttery crust.
- → Can I use homemade caramel sauce?
-
Absolutely! Homemade caramel sauce adds wonderful depth. Just ensure it's cooled slightly before drizzling so it doesn't wilt the crumb topping too much.
- → How should I store these bars?
-
Store in an airtight container at room temperature for up to 3 days. For longer storage, refrigerate for up to a week, though the crust may soften slightly.
- → Can I freeze these bars?
-
Yes, freeze individual bars wrapped tightly in plastic wrap and placed in a freezer bag for up to 3 months. Thaw at room temperature before serving.
- → Why do I need to pre-bake the crust?
-
Pre-baking creates a firm foundation that prevents the apple juices from making the bottom soggy. This ensures your bars have distinct, structural layers.
- → Can I make these in a different size pan?
-
A 9x13-inch pan will work but will produce thinner bars. Adjust baking time by 5-10 minutes less. The 9x9-inch pan yields the ideal thickness.