 Pin It
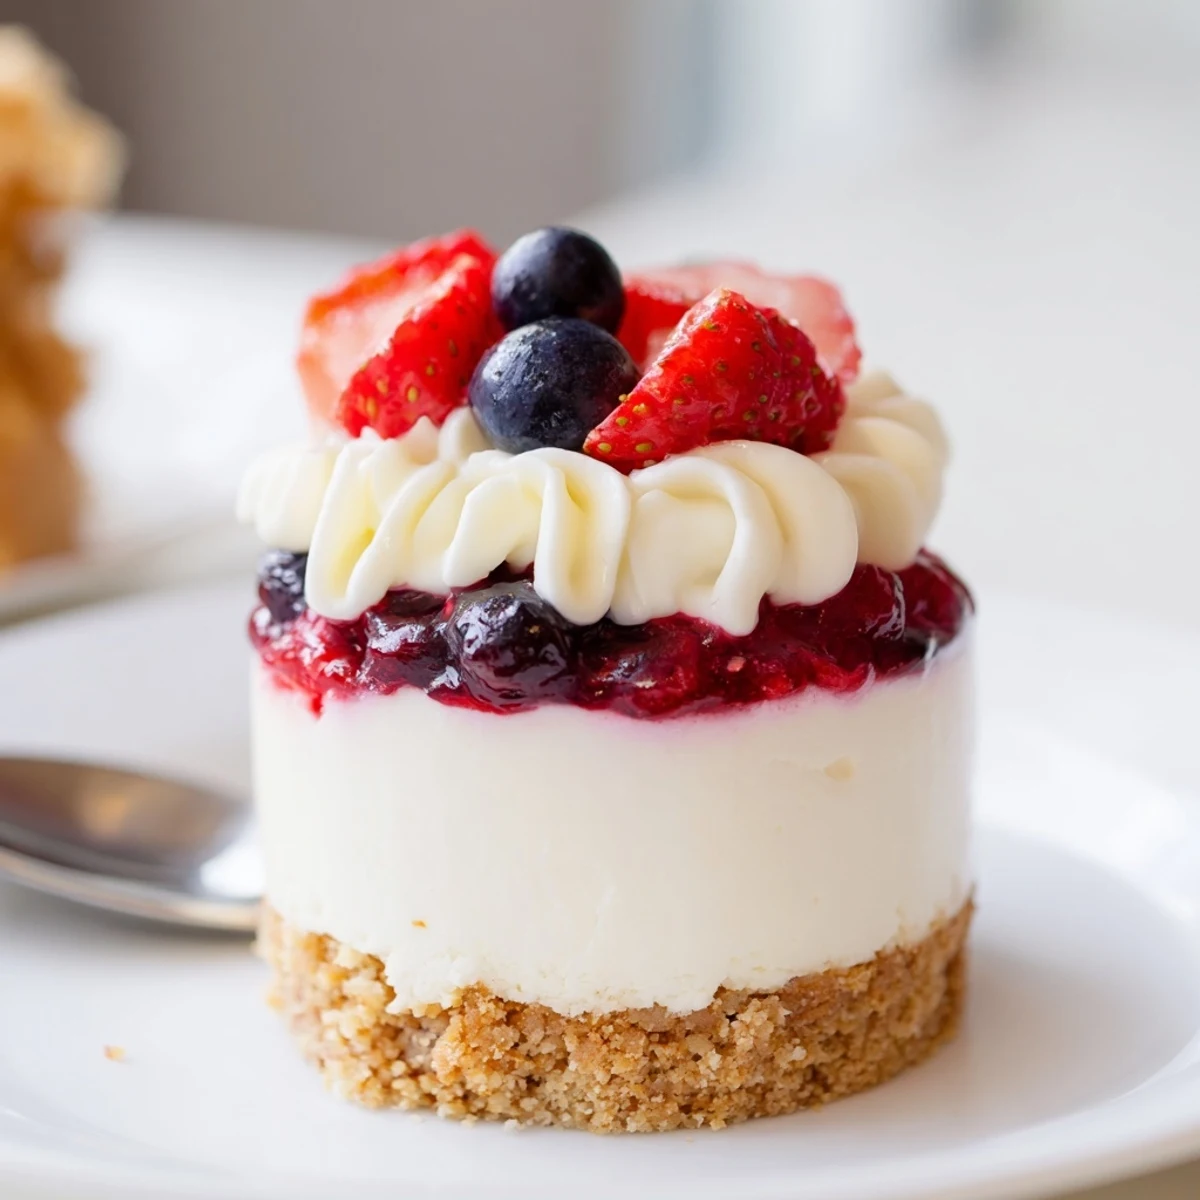
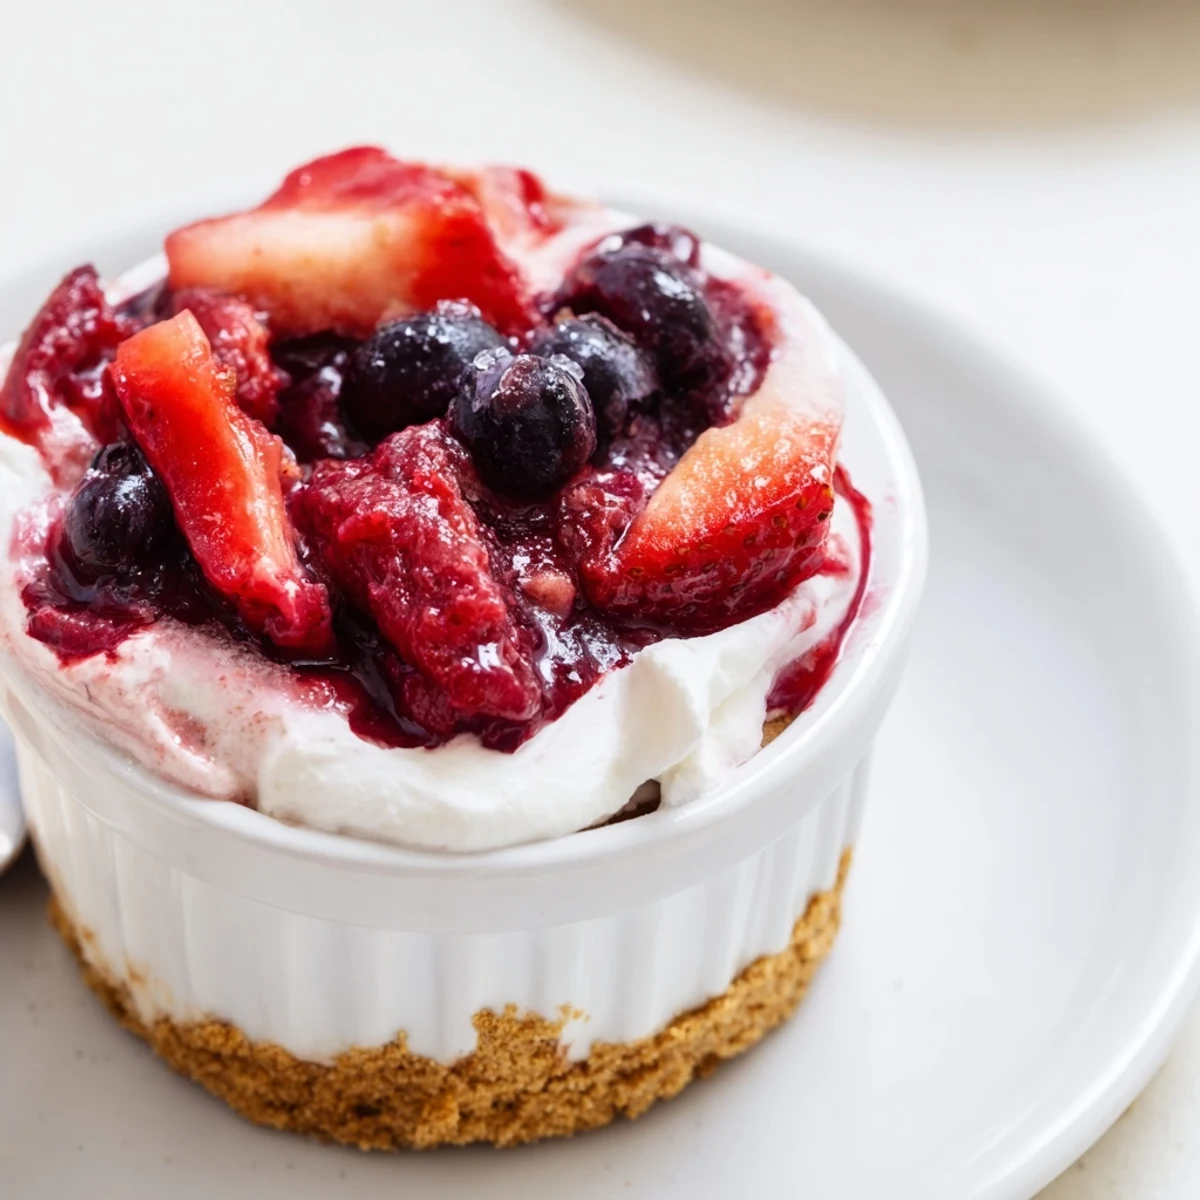
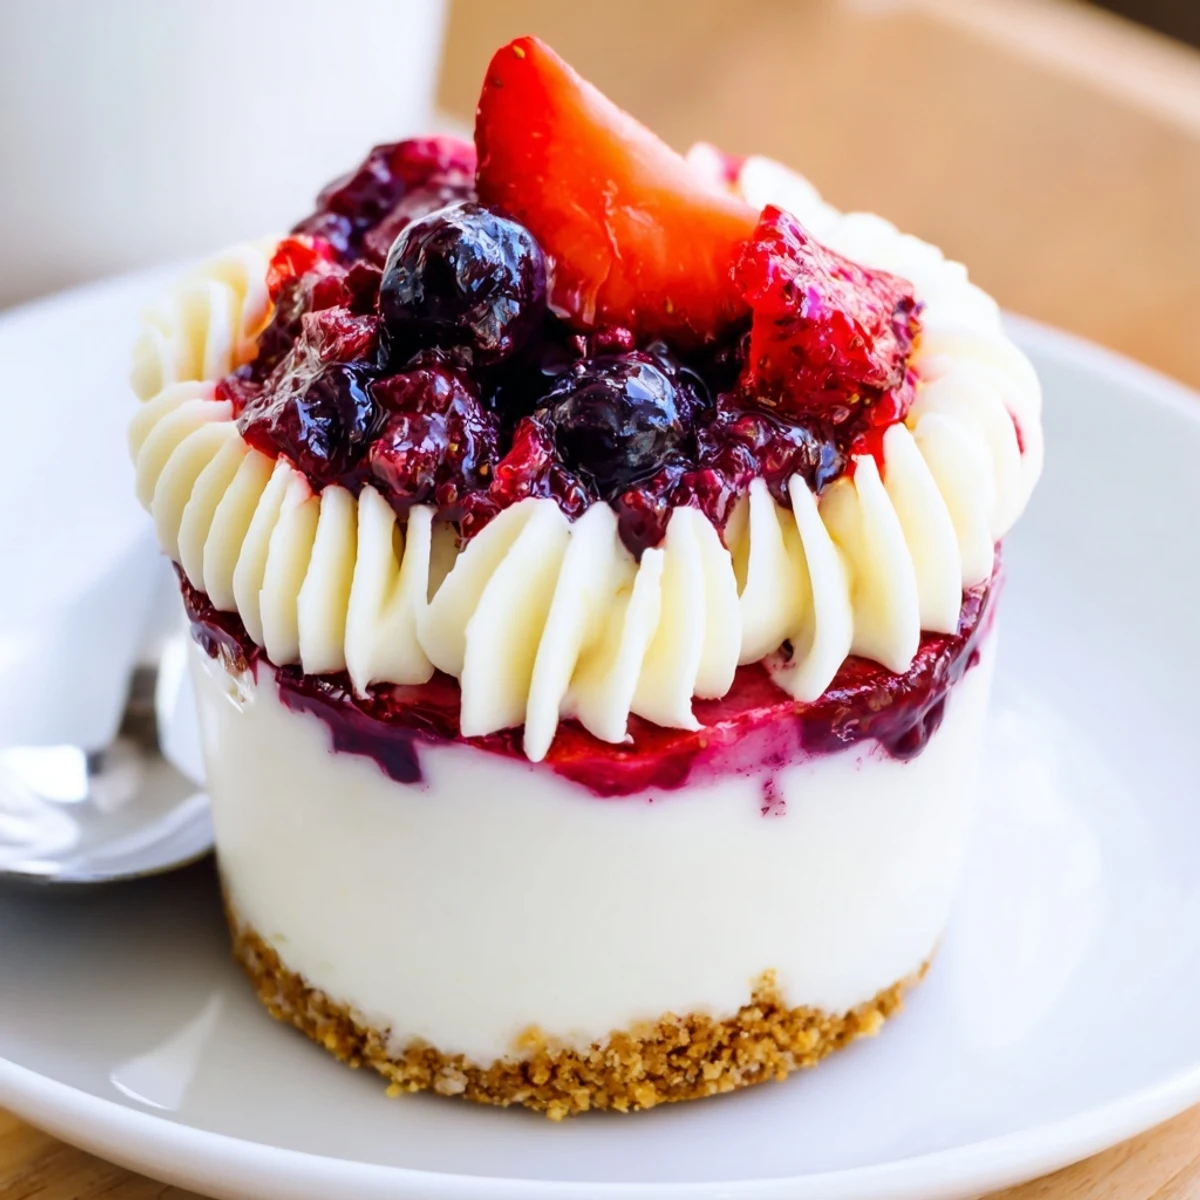
 These individual no-bake cheesecakes layer a buttery crushed-biscuit base with a silky cream cheese and whipped cream filling, topped with juicy macerated mixed berries. Press crumbs into serving glasses, whip cold cream to stiff peaks and fold gently into sweetened cream cheese, spoon over bases and chill at least 3 hours to set. Use gluten-free biscuits for a GF option or add lemon zest or a splash of berry liqueur for extra brightness.
The first time I made these berry no bake cheesecakes was on a sticky summer afternoon, with sunlight flooding the kitchen and the radio humming nineties pop hits. I remember being skeptical—could something so easy really feel so special? The aroma of lemon zest wafted through the air as I pressed the buttery biscuit crumbs into their glasses, and even before they hit the fridge, I knew I was onto a winner. Sometimes, the best things truly happen when you refuse to turn on the oven.
One evening, I made these cheesecakes for a quick gathering with friends—everyone brought a bottle of something bubbly, and somehow, dessert stole the show. People fought over the last spoonful, and someone even tried to bribe me for the recipe. It was the perfect reminder that the simplest treats can spark the most laughter.
Ingredients
- Graham crackers or digestive biscuits: The base must be crushed finely for a firm bottom layer—I like to blitz them in a bag with a rolling pin for extra crunch.
- Unsalted butter: Melted and mixed with crumbs, it brings buttery richness and holds the base together—I always let it cool ever so slightly before mixing.
- Cream cheese: Softened cream cheese ensures a smooth, lump-free filling—I leave mine out of the fridge for about 30 minutes before using.
- Heavy cream: Whipping it cold makes the filling unbelievably airy—don’t overwhip, or it’ll turn grainy.
- Powdered sugar: Sifts in smoothly—never skip sifting if you want the creamiest result.
- Vanilla extract: Adds a whisper of warmth and depth—I go for pure extract when I can.
- Lemon zest: Optional but truly brightens everything—I use a microplane for the finest zest.
- Mixed fresh berries: Choose whatever is ripe—they bleed their vivid colors into the cheesecake as they rest.
- Sugar (for topping): Just enough to macerate the berries—it draws out their juices for a glossy finish.
- Lemon juice: A quick toss wakes up the berries and balances the sweetness beautifully.
Instructions
- Biscuit base magic:
- Tumble your crushed biscuits into a bowl and pour over the melted butter; mix until every crumb gleams and smells like toasty heaven, then gently pat into serving glasses so it clings together without becoming compacted bricks.
- Creamy cheesecake bliss:
- Beat softened cream cheese till velvety, then blend in powdered sugar, vanilla, and lemon zest for a zing—watch for the gloss as you stir. In another bowl, whip cold cream until cloudlike peaks form, then fold ever so gently into your sweet cheese mixture until you can’t tell where one ends and the other begins.
- Layer with love:
- Spoon or pipe the cheesecake filling over your biscuit base, making sure to even out the layers—this part always looks fancier than it is.
- Berries on top:
- Toss your chosen berries with sugar and lemon juice and let them sit until glossy and saucy—revealing a symphony of color and scent as they mingle together.
- Chill & serve:
- Heap the juicy berries atop each cheesecake, then let everything chill for at least 3 hours—afterward, serve cold and resist licking the spoon straight from the glass (unless you’re alone).
 Pin It
 The day my niece first helped, she snuck extra berries onto hers and ended up with purple-streaked hands and a grin so wide I had to photograph her. Later, she declared it the 'best not-baked cake' ever as we clinked spoons and shared stories at the table.
Choosing Your Berries
Mixed berries keep this dessert playful—I've learned to grab what's in season or on special at the market. Strawberries for sweetness, raspberries for zing, blueberries for bursts of color: even blackberries add drama. Tossing frozen berries in warm weather sometimes turns things extra juicy, which isn't a bad thing.
Gluten-Free and Other Variations
Swapping in gluten-free biscuits means everyone can dig in with zero fuss. For a grown-up version, I once added a dash of berry liqueur to the topping and it wowed my dinner guests. Don’t hesitate to get creative with flavored extracts or even honey in the cream cheese layer.
Serving and Storage Tips
These cheesecakes are happiest served cold straight from the fridge—leftovers (if any) stay luscious for a day or two, covered. I’ve sometimes assembled them in small jars for picnics, which makes for a mess-free treat enjoyed under the open sky.
- Don’t skip the resting time: good things set with patience.
- Layering into clear glasses shows off those beautiful layers.
- Keep utensils cold when whipping cream on hot days.
 Pin It
 However you serve them, these berry no bake cheesecakes promise a spoonful of joy with every bite. Let them cool off your summer, or brighten up a chilly evening—either way, dessert is sorted.
Recipe Questions & Answers
- → How long should these be chilled?
-
Chill for a minimum of 3 hours to allow the filling to firm up; overnight refrigeration yields a creamier, more set texture. Keep covered in the fridge until ready to serve.
- → Can I use gluten-free biscuits for the base?
-
Yes. Swap in gluten-free digestive or oat cookies in equal weight. Press the crumbs firmly so the base holds together while chilling.
- → How do I prevent a soggy biscuit base?
-
Press crumbs tightly and evenly into the glass, use just enough melted butter to bind, and chill the bases briefly before adding the filling. For extra protection, spread a thin layer of melted chocolate over the crumbs and let it set.
- → Are frozen berries okay for the topping?
-
Frozen berries can work if fully thawed and drained first. If they release a lot of juice, simmer briefly with a little sugar to reduce excess liquid, then cool before spooning over the filling.
- → How can I ensure a light, stable filling?
-
Beat the cream cheese until smooth and fully incorporate the powdered sugar. Whip the cold heavy cream to stiff peaks and fold in gently to retain air. Chill well to allow the filling to firm up.
- → Can these be prepared ahead of time?
-
Yes. Assemble and chill up to 24 hours in advance. For the freshest topping, prepare the berry mixture a few hours before serving or add the berries just before serving.